

Plants & Spaces
Styling an Indoor Plant Wall: Plants, Light, and Placement
Begin with the light, leave room for leaves, and make everyday care easy to reach. A plant wall can start with a single considered placement.

A plant wall does not need to cover a wall. One planter in the right place can change how a corner feels; a few can create a composition that moves beyond the edges of their containers.
The most useful starting point is not the number of planters. It is the light, the shape of the plants, and how you will care for them once they are in place.
Choose the light before the layout
Look at the wall at different times of day. A bright room does not necessarily provide the same light at every planting position, especially farther from a window or behind another object.
Choose plants for the conditions at the actual location. University of Minnesota Extension’s indoor lighting guide recommends matching plant needs to available light, or supplementing when the location cannot provide it.
Do not choose a dim corner solely because an empty wall needs something. Move the composition toward suitable light, or plan appropriate lighting before choosing the plants.
Decide what the leaves should do
For a trailing effect, choose a plant whose growth naturally moves beyond the planter. For a compact focal point, look for a more contained form. An upright plant will draw the eye differently from a curtain of small leaves.
These are design directions, not guarantees that every trailing or upright plant has the same watering requirements. After choosing the visual effect, check the needs and root-ball size of the individual plant.
In our Cloud photographs, the composition combines upright growth with fine trailing stems. The planter acts as a point of origin, not a frame that contains every leaf. The images are useful as composition references, rather than a planting recipe for every room.
Let the planter contribute its own shape
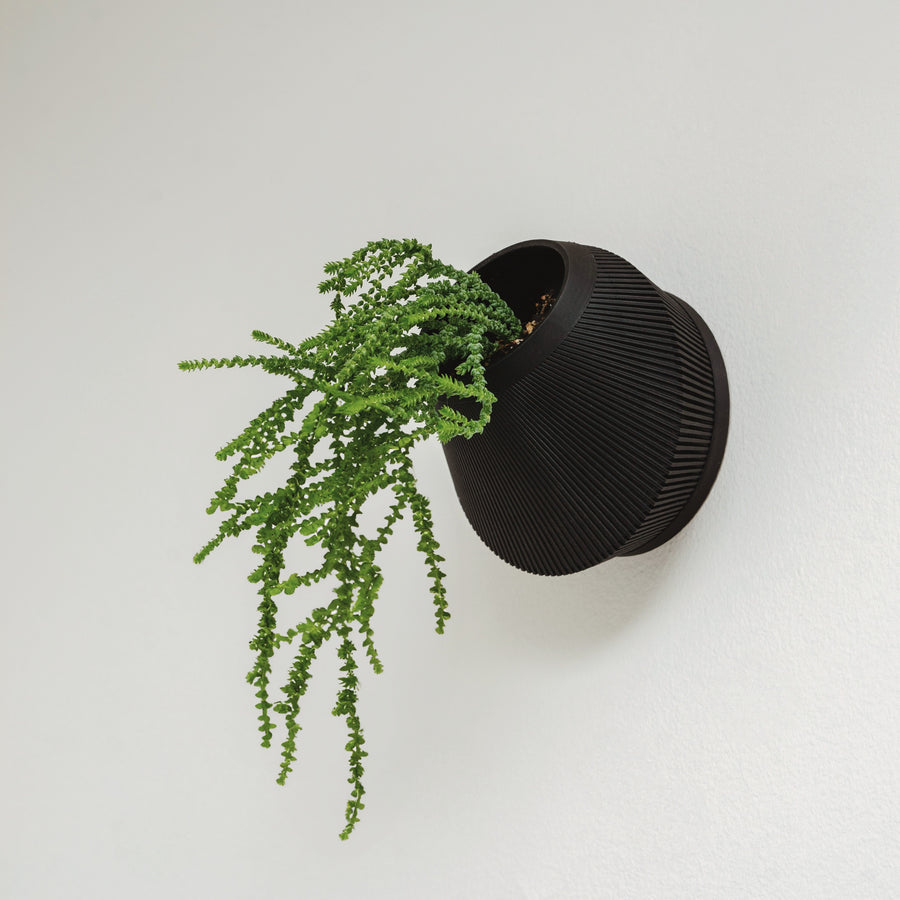
Cloud has a rounded outline that can soften the edge of a grouping. Bevel offers an angular profile that can sit more deliberately alongside shelving, artwork or architectural lines.
Repeating one shape creates rhythm. Mixing outlines can create a looser composition, but give the plants and planters one shared element—perhaps color, direction or spacing—rather than making every decision different.
Before mounting, cut paper shapes to the exterior dimensions and try them on the wall. Stand back from the position where you will usually see the arrangement. Imagine the leaves extending beyond each paper shape, not just the container itself.
Leave space for care
A pleasing height is not always a practical one. You should be able to inspect the planting area, reach the refill opening and check the reservoir without an awkward daily routine.
Keep neighboring objects and foliage from blocking the ventilation slots. Leave room to access the planter and to remove it when the design’s maintenance instructions require it.
Mount securely using hardware suitable for the wall and the weight of the complete planted arrangement, including water. Follow the product’s mounting guidance; there is no single fastener that is right for every wall. Plants and mounting hardware are not included with VerdiPot wall planters.
Check the opening before choosing the plant
The exterior measurement tells you how much of the wall the planter occupies. The planting opening is a separate measurement, and our wall planters do not contain a removable inner pot.
A plant that looks proportionate above the container may still be difficult to plant through its opening. The wall-planter size and structure guide explains that distinction before you commit to a combination.
Start with room to change
Leave a little more empty space than the first arrangement seems to need. Trailing stems, new leaves and a change in direction can become part of the composition.
A thoughtful plant wall is not a finished picture that must stay still. It is a place where the plants can gradually make themselves at home.
Explore the shapes in Vertical.